larry_stewart
Master Chef
By popular demand, I started this thread to document the process of me making Miso. Full disclosure, I am making it using a kit, so it was a simple, just follow the steps , process. I have made it in the past ( years ago). It came out good, but since I don't use it often, I literally just ran out, which is why Im making more ( the stuff lasts forever in the fridge). Since I started this thread late, towards the end of the process, I'll explain what I did , and show a few pics of the miso in progress. Most of the info I am giving is just repeating from the instructions I am following ( In my own words), so if they are not accurate, or not in line with things you've seen, read or tried in the past, oh we'll.
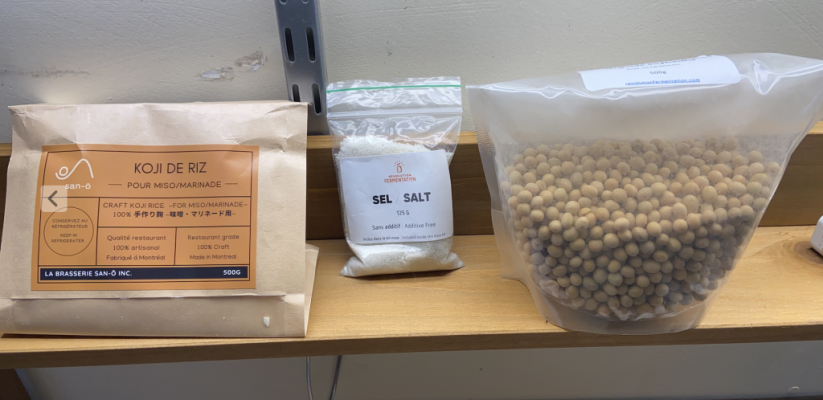
Ingredients : Soybeans, Rice Koji, Salt ( and water)
- White,Yellow and Red Miso apparently are made from the same ingredients. The differences depend on the quantity of soy beans, salt and duration of fermentation.
- White miso takes the shortest amount of time (2 - 8 weeks), which is the one I am making.
- Yellow Miso ( 6 months). After a few weeks, a dark liquid forms one the surface, which is Tamari ( as Taxlady pointed out to me. I didnt know Tamari was a byproduct of making Miso ( Thanks Tax !). All this being said, Im now 3 weeks into the process, I noticed a darkish liquid on top ( which I dont remember having the first time I made miso). I took a little taste, and sure enough it has a tamari-like taste. Im sure with longer fermentation it will develop its full flavor.
- Red Miso ( 1 year + )
Process:
Ingredients Preparation
- Rinse soy beans and soak them over night.
- Drain, rinse then add water and boil for several hours until the beans crush easily under finger pressure
- Drain ( Saving some of the liquid) , Cool to room temperature, puree in food processor.
***I wasnt able to get a good smooth paste. Mine was a little grainy, but I read that different varieties off miso from different regions have different textures ( some a little grainy) so I didnt stress over it.***
- Mix the pureed soy beans, salt and rice koji. Knead by hand, adding some of the extra liquid until you get a " Playdough' like texture.
*** Like other fermentation processes, you can add some unpasteurized miso ( from a previous batch) to inoculate the new batch***
Placing mixture in Jar
- Sterilize jar with boiling water
- Sprinkle salt at the bottom of the jar, making sure it is evenly dispersed at the bottom
- Fill jar with Miso paste, pressing it firmly so there are no air pockets
- Cover top of paste with cellophane and press it so it adheres to the surface ( no bubbles)
- Sprinkle salt along the edge of the cellophane , where it meets the jar
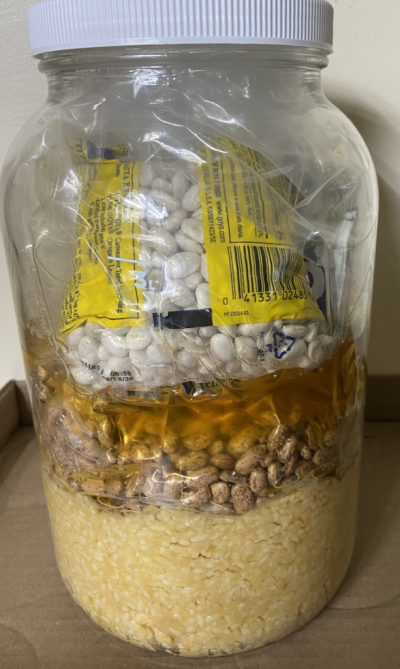
- There needs to be pressure on the paste, so they provided me with a clear plastic bag that needs to be loaded with about 1.5 kg of weight. they suggest marbles, salt , legumes..). I chose legumes since I have so many, and the weight is listed on the bags.
- Seal jar, date and store in room temp out of direct sight.
- Since Im making the white, check back in 2 + weeks.
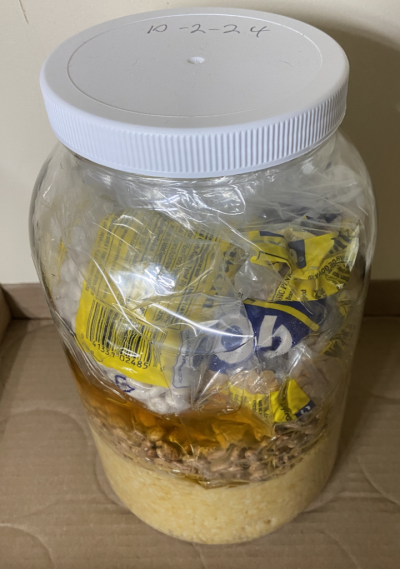
It is now 3 plus weeks, I noticed liquid forming above the paste ( which I tasted and has that tamari like taste). Also, has the smell of miso at this point. I haven't tasted it yet. Im thinking of letting it ferment a few more weeks before I dig in.
Since I started this thread after I started the process, I included pics of the ingredients ( or bags of ingredients ) which came with the kit.
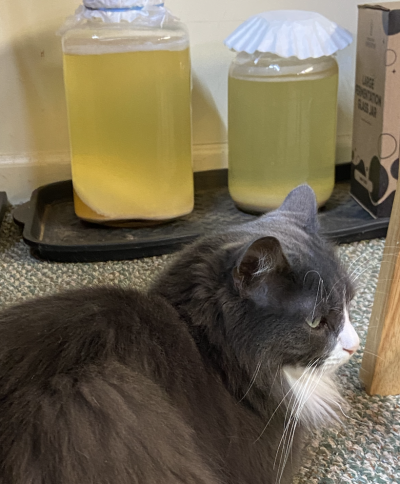
I also included a pic of the Miso in progress, which consists of a 1 gallon jar, miso paste at the bottom, about 1.5 kg off beans weighing it down ( beans in a sealed plastic bag as not to contaminate the miso itself). Also, if you look closely, you can see an amber - like liquid about an inch or two above the paste surface ( due to the bag being in there, the liquid is kinda riding up in between the glass and bag).
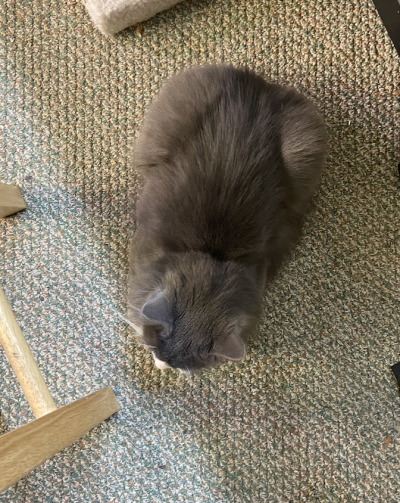
And finally, there is a pic of my cat , Shlomo, who is sitting with me as I write this post ( He's actually staring at the apple cider vinegar I have in progress)
All in all, a very easy, and relatively quick process. Now that I know tamari is a byproduct, I will make yellow next time so I can get more bang for my buck. Also, this seems much more predictable Thant my soy sauce attempt a few years back.
Ingredients : Soybeans, Rice Koji, Salt ( and water)
- White,Yellow and Red Miso apparently are made from the same ingredients. The differences depend on the quantity of soy beans, salt and duration of fermentation.
- White miso takes the shortest amount of time (2 - 8 weeks), which is the one I am making.
- Yellow Miso ( 6 months). After a few weeks, a dark liquid forms one the surface, which is Tamari ( as Taxlady pointed out to me. I didnt know Tamari was a byproduct of making Miso ( Thanks Tax !). All this being said, Im now 3 weeks into the process, I noticed a darkish liquid on top ( which I dont remember having the first time I made miso). I took a little taste, and sure enough it has a tamari-like taste. Im sure with longer fermentation it will develop its full flavor.
- Red Miso ( 1 year + )
Process:
Ingredients Preparation
- Rinse soy beans and soak them over night.
- Drain, rinse then add water and boil for several hours until the beans crush easily under finger pressure
- Drain ( Saving some of the liquid) , Cool to room temperature, puree in food processor.
***I wasnt able to get a good smooth paste. Mine was a little grainy, but I read that different varieties off miso from different regions have different textures ( some a little grainy) so I didnt stress over it.***
- Mix the pureed soy beans, salt and rice koji. Knead by hand, adding some of the extra liquid until you get a " Playdough' like texture.
*** Like other fermentation processes, you can add some unpasteurized miso ( from a previous batch) to inoculate the new batch***
Placing mixture in Jar
- Sterilize jar with boiling water
- Sprinkle salt at the bottom of the jar, making sure it is evenly dispersed at the bottom
- Fill jar with Miso paste, pressing it firmly so there are no air pockets
- Cover top of paste with cellophane and press it so it adheres to the surface ( no bubbles)
- Sprinkle salt along the edge of the cellophane , where it meets the jar
- There needs to be pressure on the paste, so they provided me with a clear plastic bag that needs to be loaded with about 1.5 kg of weight. they suggest marbles, salt , legumes..). I chose legumes since I have so many, and the weight is listed on the bags.
- Seal jar, date and store in room temp out of direct sight.
- Since Im making the white, check back in 2 + weeks.
It is now 3 plus weeks, I noticed liquid forming above the paste ( which I tasted and has that tamari like taste). Also, has the smell of miso at this point. I haven't tasted it yet. Im thinking of letting it ferment a few more weeks before I dig in.
Since I started this thread after I started the process, I included pics of the ingredients ( or bags of ingredients ) which came with the kit.
I also included a pic of the Miso in progress, which consists of a 1 gallon jar, miso paste at the bottom, about 1.5 kg off beans weighing it down ( beans in a sealed plastic bag as not to contaminate the miso itself). Also, if you look closely, you can see an amber - like liquid about an inch or two above the paste surface ( due to the bag being in there, the liquid is kinda riding up in between the glass and bag).
And finally, there is a pic of my cat , Shlomo, who is sitting with me as I write this post ( He's actually staring at the apple cider vinegar I have in progress)
All in all, a very easy, and relatively quick process. Now that I know tamari is a byproduct, I will make yellow next time so I can get more bang for my buck. Also, this seems much more predictable Thant my soy sauce attempt a few years back.